project // rainbow-stitched cuff bracelet New Update
project // rainbow-stitched cuff bracelet New Update - Hello friend y3ant.blogspot.com y3ant, In the article that you read this time with the title project // rainbow-stitched cuff bracelet New Update , we have prepared this article well for you to read and retrieve information in it. hopefully fill in the post
Artikel embroidery,
Artikel projects,
Artikel rainbow, what we write can you understand. OK, happy reading.
Judul : project // rainbow-stitched cuff bracelet New Update
link : project // rainbow-stitched cuff bracelet New Update
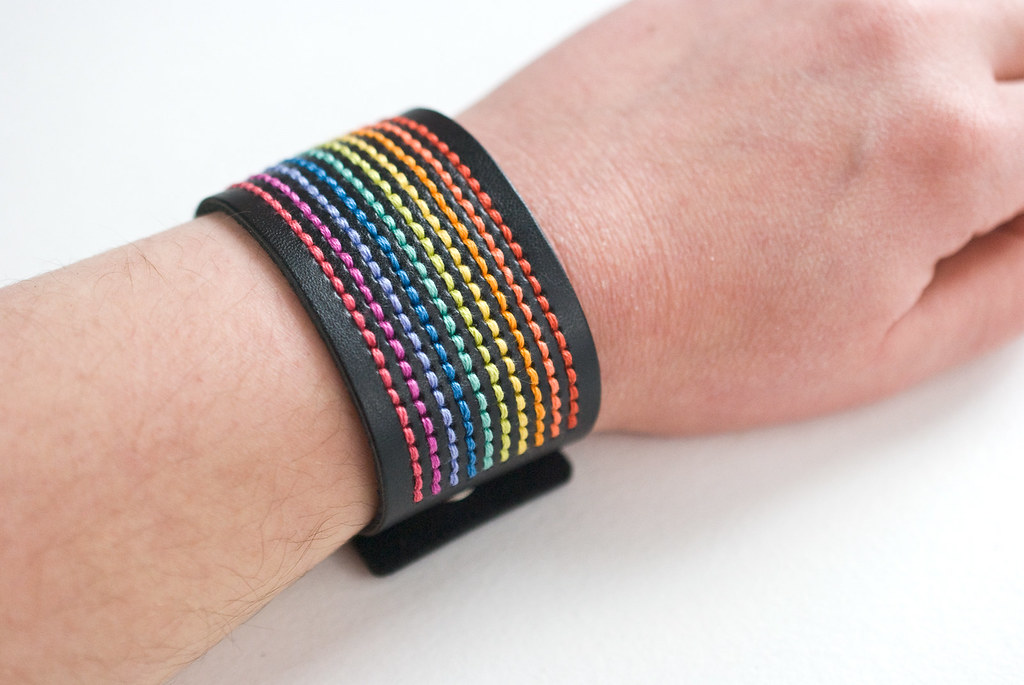
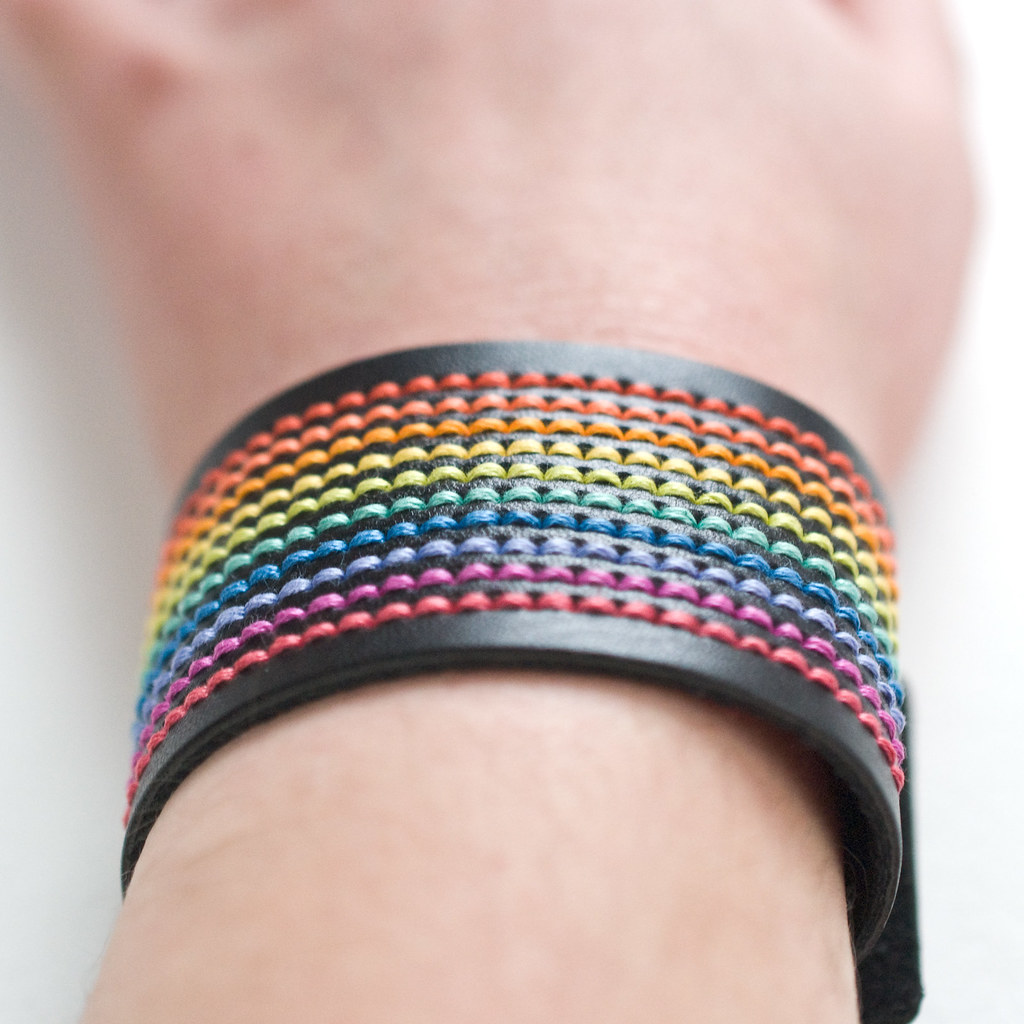
When DMC released their stitchable cuff bracelets not too long ago, I was excited to try them. I don't wear cuffs very often, but you know...this is just too fun, right? I mean, who can resist embroidered jewelry?
These faux-leather cuffs come pre-punched and ready to stitch. They come in four colors (black, white, pink, and blue) and they have two snaps. Technically, those snaps make the size adjustable, though I think it's really intended to be one-size using both snaps.
The sample photos and other patterns I've seen for these cuffs show them with cross stitch. But I wanted to see how I might use the bracelets with simple embroidery. And what could be simpler than stripes of back stitch? But not just any stripes...rainbow stripes!
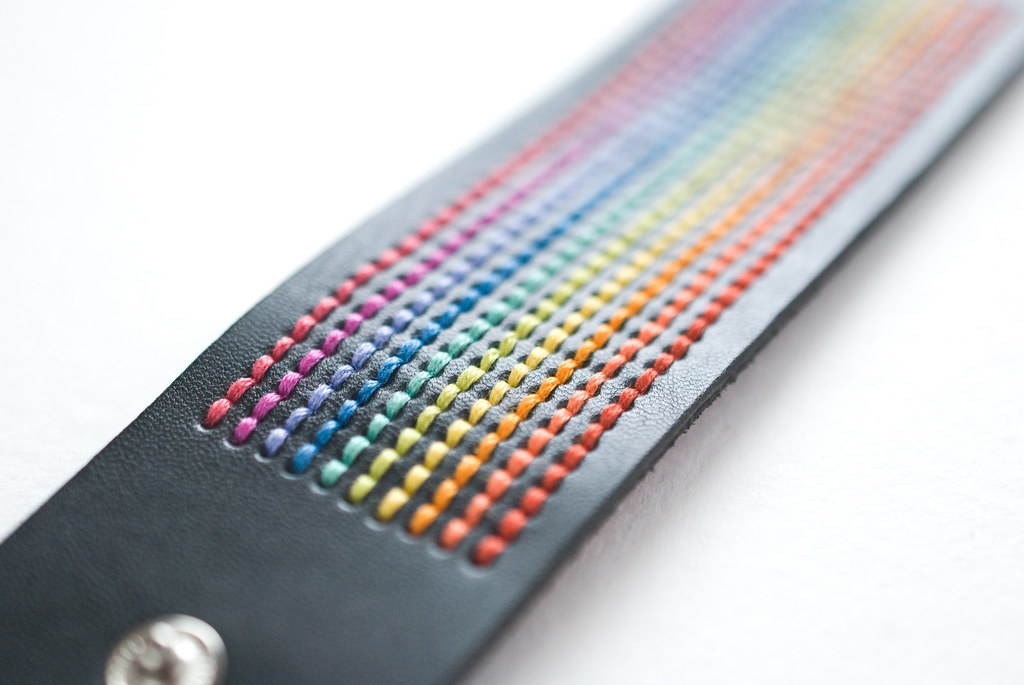
DMC sent me one of each color to try, and I went with black to show off my nearly neon rainbow palette. It feels a bit like a video game to me, and definitely like my childhood.
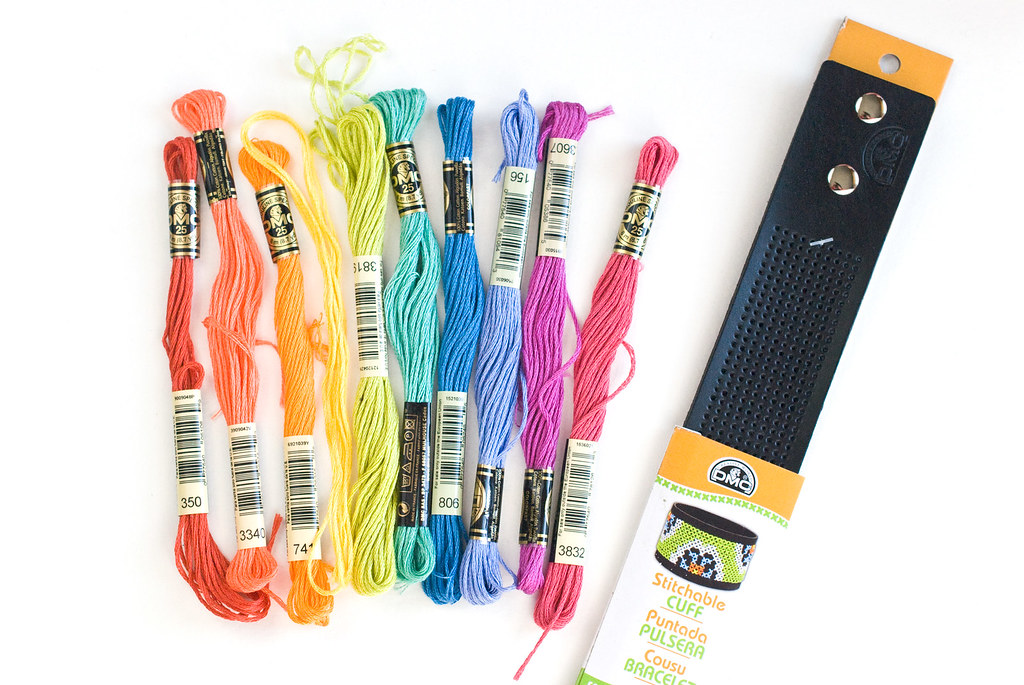
To make a rainbow cuff bracelet, you will need a DMC Stitchable Cuff and 10 embroidery floss colors (There are ten long rows of holes). I used DMC 350, 3340, 741, 743, 3819, 993, 806, 156, 3607, and 3832.
For some rainbow inspiration, check out my collection of rainbow floss palettes. You'll need to add a few extra colors in there, but they'll get you started!
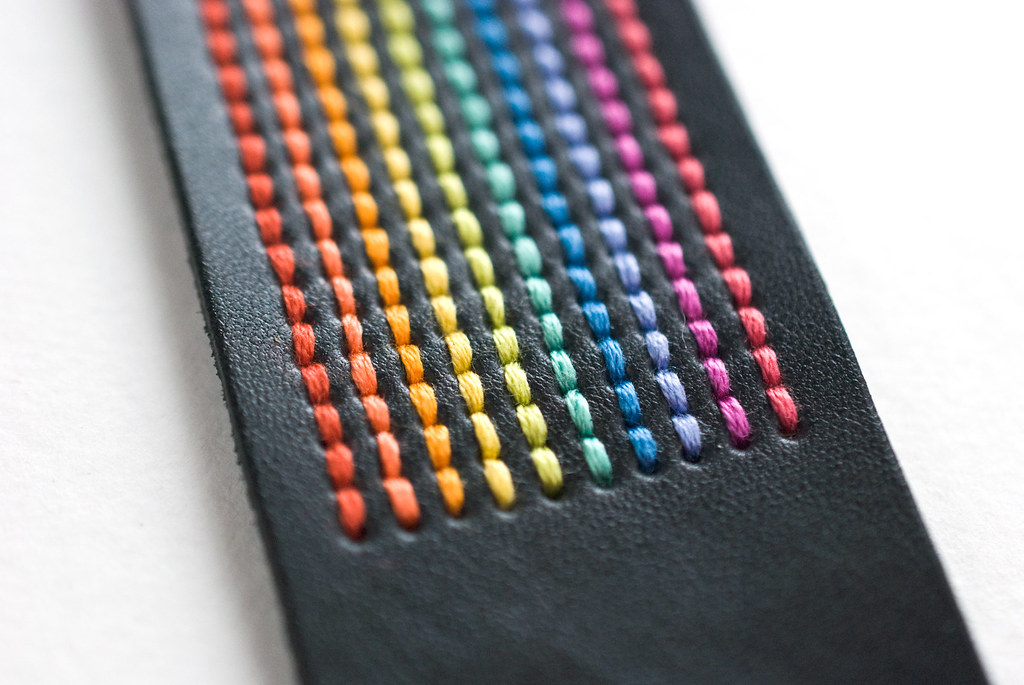
For each color, stitch a line of back stitch, working through the pre-punched holes.
One of the things I love about this is that it doesn't require much thought as you work. It's just straight lines! Mind you, I did stitch half a row before realizing that it was the wrong color. Oops! Just pay attention that you have the colors in rainbow order.
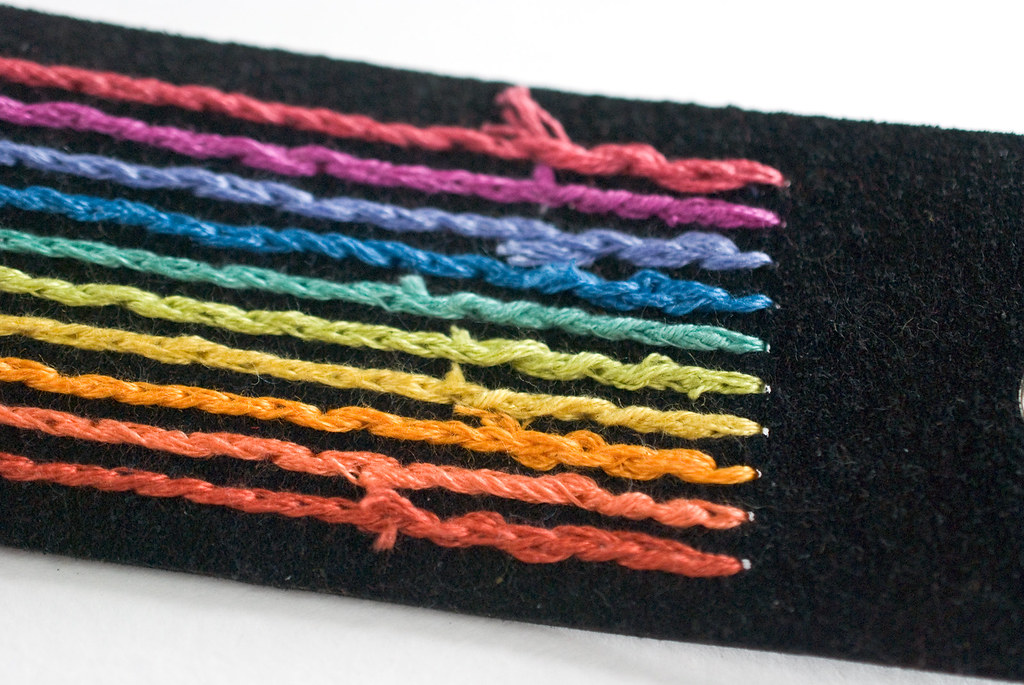
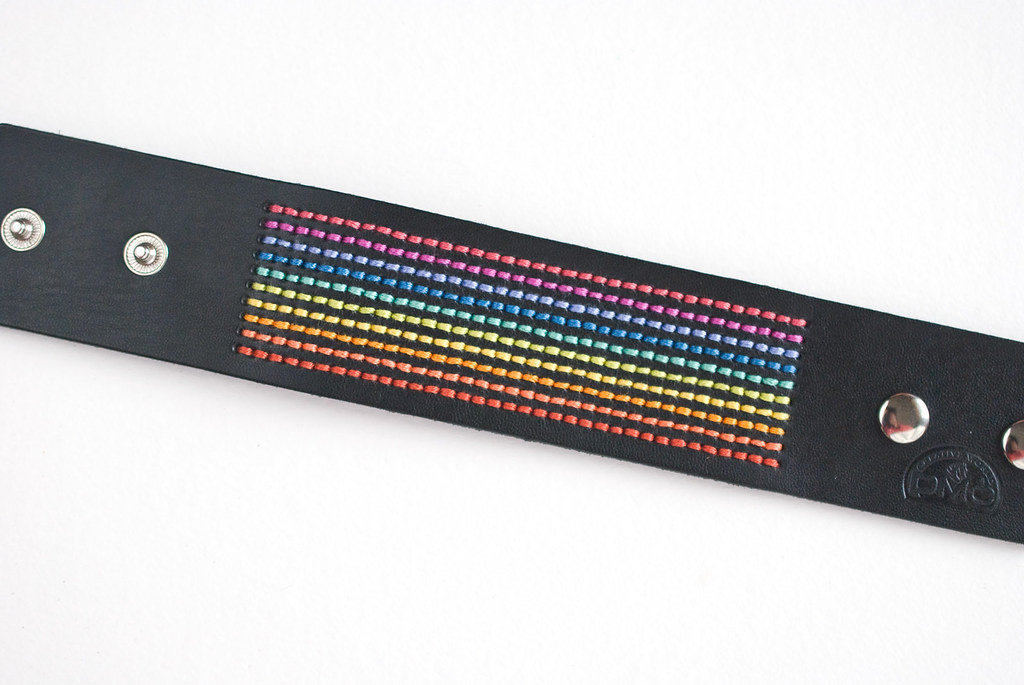
I'm not opposed to knots on the back of embroidery, but in this case, I didn't trust them to not pop through the holes in the bracelet. To start each line I held a tail on the back and stitched over the tail to secure it and to end each line, I wove the thread through the back of the stitches.
You can stitch this entire bracelet in an afternoon or evening (maybe two), and I'm quite sure you'll find it to be super relaxing. I already have plans for my next cuff!
Many thanks to DMC for sending me these to try, and for making such fun products and great floss!
You are now reading the article project // rainbow-stitched cuff bracelet New Update with the link address https://y3ant.blogspot.com/2017/03/project-rainbow-stitched-cuff-bracelet.html
Judul : project // rainbow-stitched cuff bracelet New Update
link : project // rainbow-stitched cuff bracelet New Update
project // rainbow-stitched cuff bracelet New Update
When DMC released their stitchable cuff bracelets not too long ago, I was excited to try them. I don't wear cuffs very often, but you know...this is just too fun, right? I mean, who can resist embroidered jewelry?
These faux-leather cuffs come pre-punched and ready to stitch. They come in four colors (black, white, pink, and blue) and they have two snaps. Technically, those snaps make the size adjustable, though I think it's really intended to be one-size using both snaps.
The sample photos and other patterns I've seen for these cuffs show them with cross stitch. But I wanted to see how I might use the bracelets with simple embroidery. And what could be simpler than stripes of back stitch? But not just any stripes...rainbow stripes!
DMC sent me one of each color to try, and I went with black to show off my nearly neon rainbow palette. It feels a bit like a video game to me, and definitely like my childhood.
To make a rainbow cuff bracelet, you will need a DMC Stitchable Cuff and 10 embroidery floss colors (There are ten long rows of holes). I used DMC 350, 3340, 741, 743, 3819, 993, 806, 156, 3607, and 3832.
For some rainbow inspiration, check out my collection of rainbow floss palettes. You'll need to add a few extra colors in there, but they'll get you started!
For each color, stitch a line of back stitch, working through the pre-punched holes.
One of the things I love about this is that it doesn't require much thought as you work. It's just straight lines! Mind you, I did stitch half a row before realizing that it was the wrong color. Oops! Just pay attention that you have the colors in rainbow order.
I'm not opposed to knots on the back of embroidery, but in this case, I didn't trust them to not pop through the holes in the bracelet. To start each line I held a tail on the back and stitched over the tail to secure it and to end each line, I wove the thread through the back of the stitches.
You can stitch this entire bracelet in an afternoon or evening (maybe two), and I'm quite sure you'll find it to be super relaxing. I already have plans for my next cuff!
Many thanks to DMC for sending me these to try, and for making such fun products and great floss!
This is the article project // rainbow-stitched cuff bracelet New Update
So many articles project // rainbow-stitched cuff bracelet New Update this time, hopefully it can benefit you all. OK, see you in another article.
You are now reading the article project // rainbow-stitched cuff bracelet New Update with the link address https://y3ant.blogspot.com/2017/03/project-rainbow-stitched-cuff-bracelet.html