project // guinea pig cushion New Update
project // guinea pig cushion New Update - Hello friend y3ant.blogspot.com y3ant, In the article that you read this time with the title project // guinea pig cushion New Update , we have prepared this article well for you to read and retrieve information in it. hopefully fill in the post
Artikel critters,
Artikel guinea pigs,
Artikel plush,
Artikel projects,
Artikel stitch love, what we write can you understand. OK, happy reading.
Judul : project // guinea pig cushion New Update
link : project // guinea pig cushion New Update
When I heard that July 16 is Guinea Pig Appreciation Day, I knew that I needed to do something to show my own appreciation for these sweet little critters that have captured my heart. Last year I made a pouch for them to laze about in, and they love it. So it seemed like time for another DIY designed for guinea pigs. Although this one would also be fun for humans too!
The idea for this came when one of my piggies was sitting comfortably in a bean bag chair watching an old episode of Scarecrow and Mrs. King on DVD. She was nestled in there and just so very cute. True story.
So I thought, what if they had their own piggy bean bag? Well, this isn't exactly a bean bag, but it is a soft and slightly squishy spot for piggies to watch some Netflix.

Of course, even when you're crafting for critters, you can make things cute. So I made my cushion look like a guinea pig. It's styled a bit like the stuffed guinea pig in my book, Stitch Love: Sweet Creatures Big and Small. Because of this, I think it would just as fun to make this as a little pillow for a piggy fan!
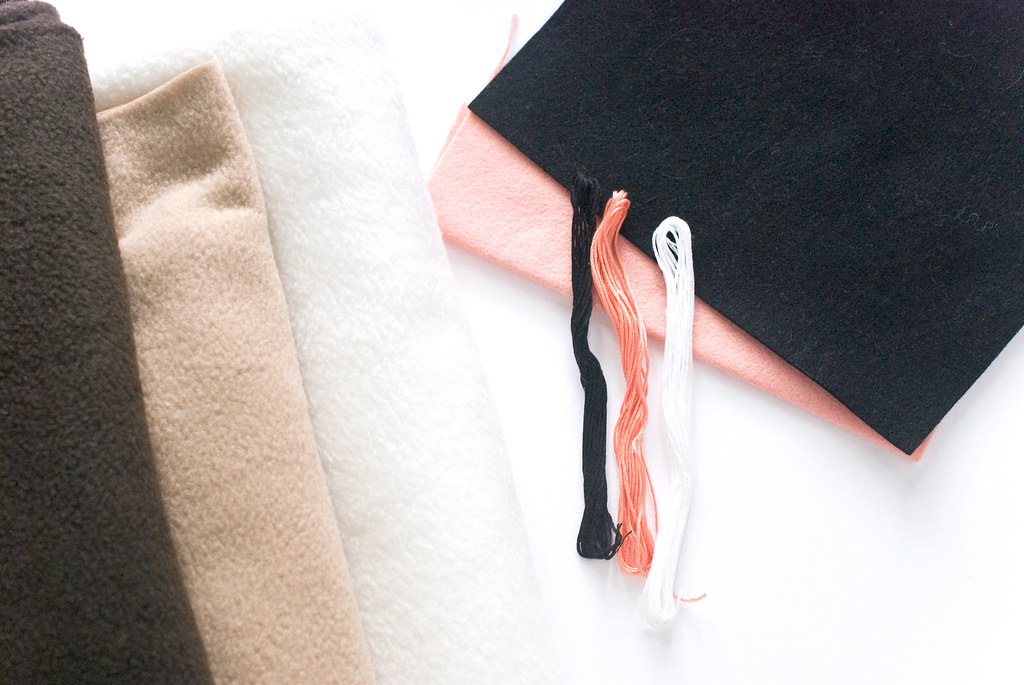
You will need:
No-pill fleece - guinea pig colors
Wool blend felt - black and pink
Embroidery floss - black, pink, and white
Sewing notions
Sewing machine
DOWNLOAD THE GUINEA PIG CUSHION TEMPLATE PDF
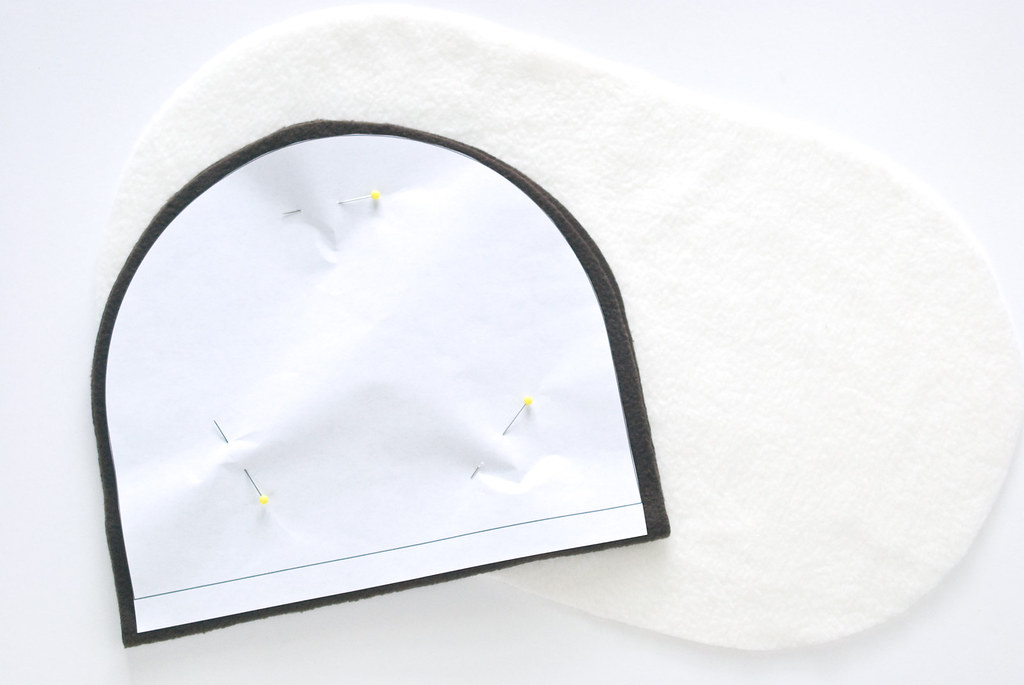
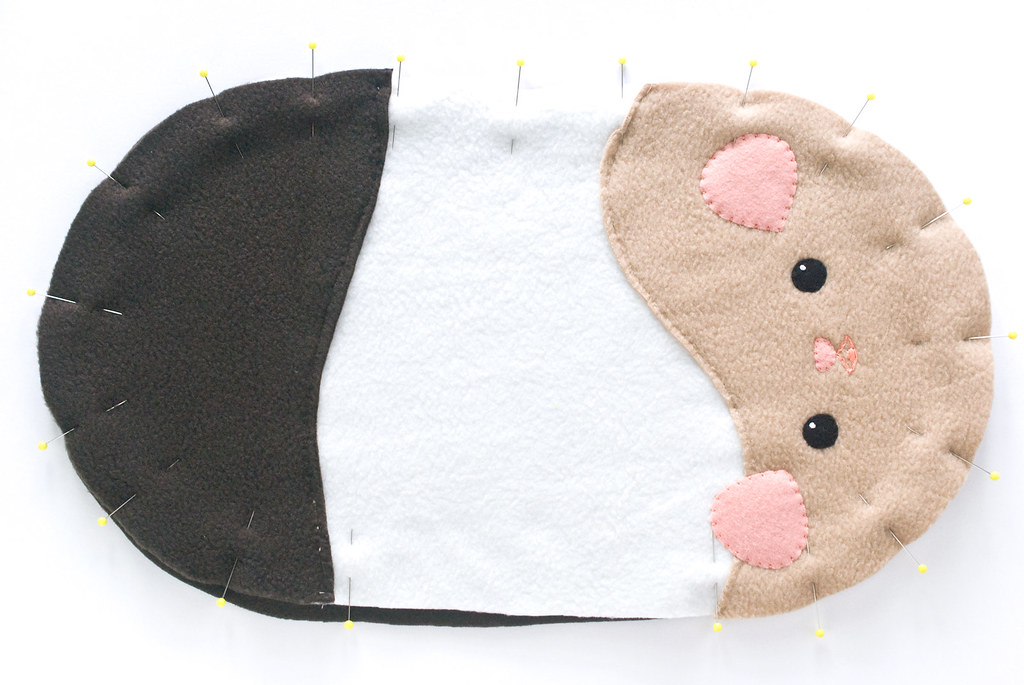
Cut two large body pieces from fleece. I used cream for the top and brown for the bottom.
To do this, place the pattern piece on the fold, paying attention to the stretch arrows on the template (not shown above). I extended my pattern piece to the edge of the paper, but you can cut it off for a stubbier guinea pig.
Cut around the edge adding a 3/8-inch seam allowance.
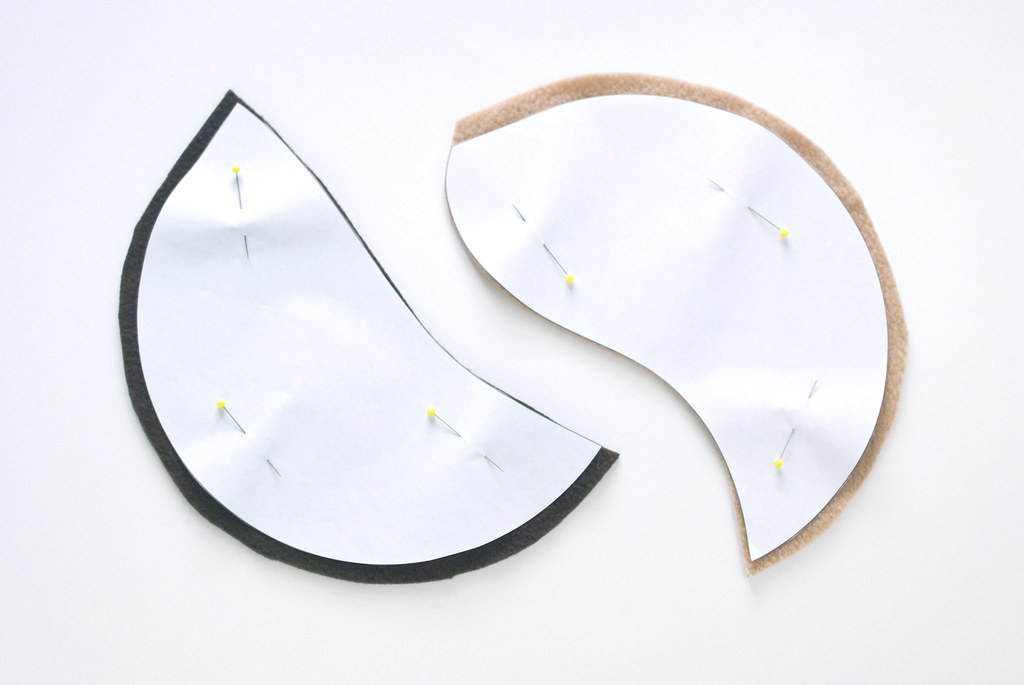
Cut the front and back accent pieces with an added seam allowance around the curved ends, but not on the swerve.
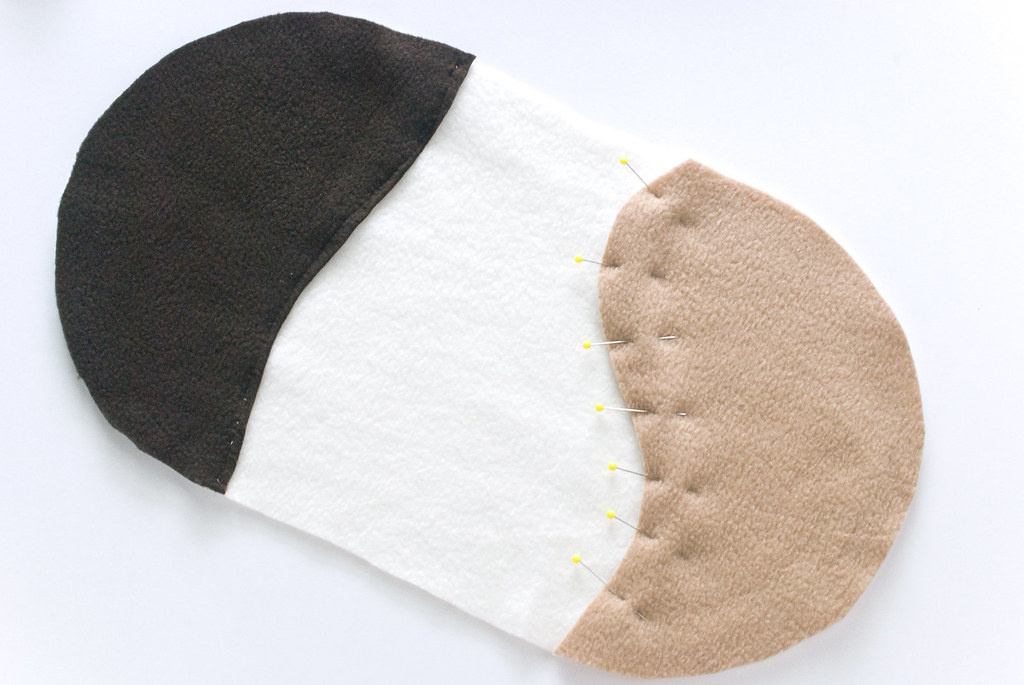
Pin the accent pieces to the top body piece and sew along the swerve. (That's officially now my technical term for that wavy bit.)
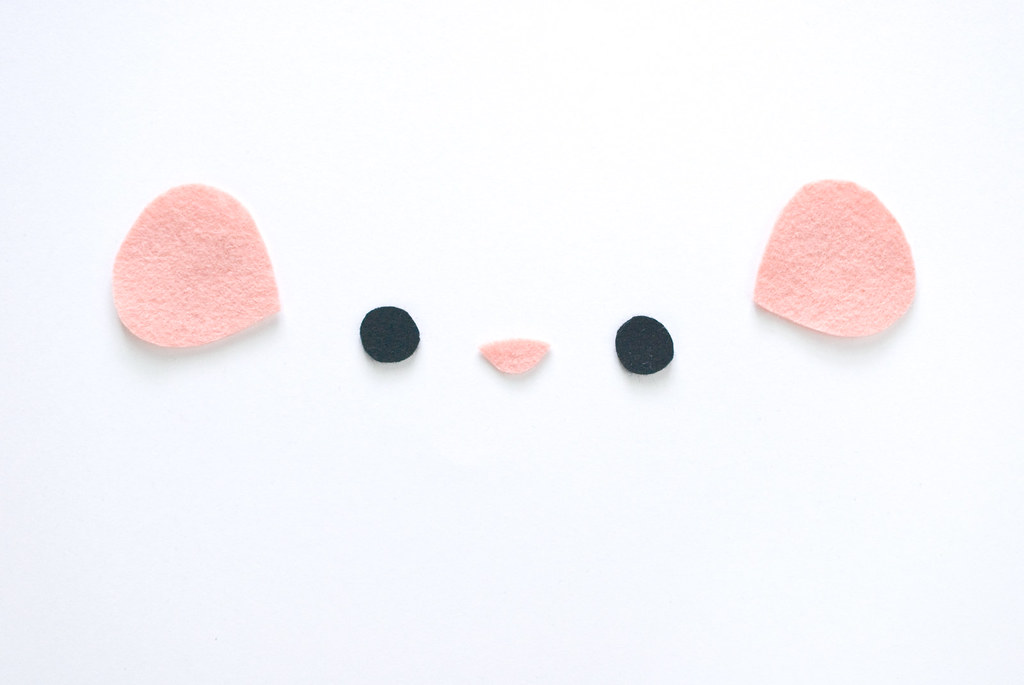
Cut out two eyes from black felt, and two ears and one nose from pink felt.
Arrange the face pieces so they look cute and start stitching them down. Use three strands of matching thread to tack down the edges of the felt.
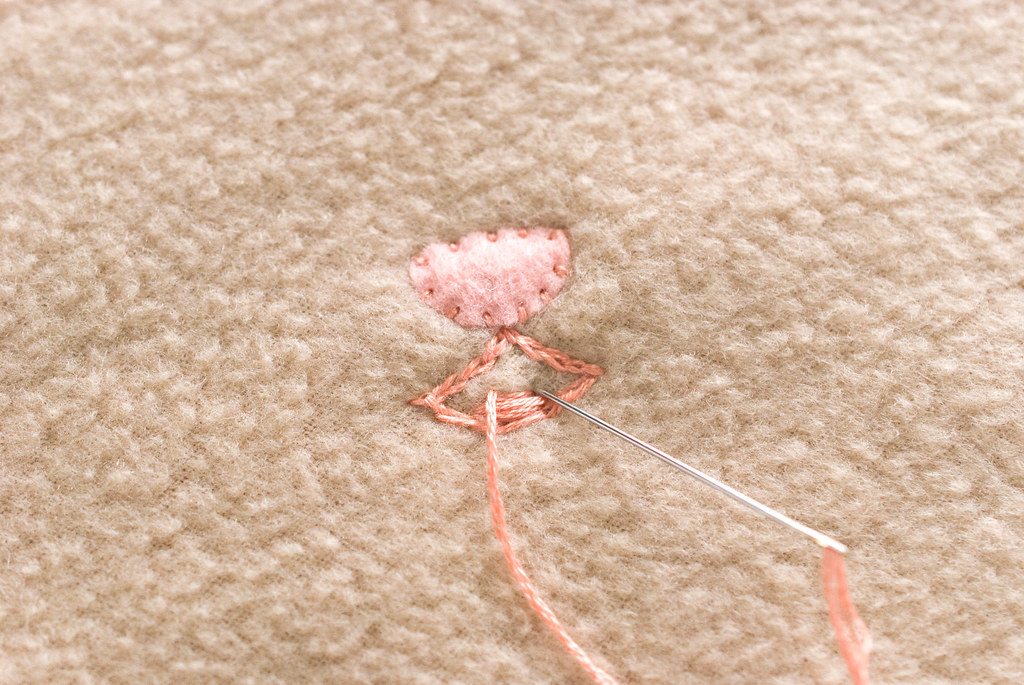
Embroider the mouth with pink embroidery floss. I used chain stitch to make a thicker line, although satin stitch would probably be better for making super cute and smooth guinea pig lips. I did use satin stitch for the teeny tongue.
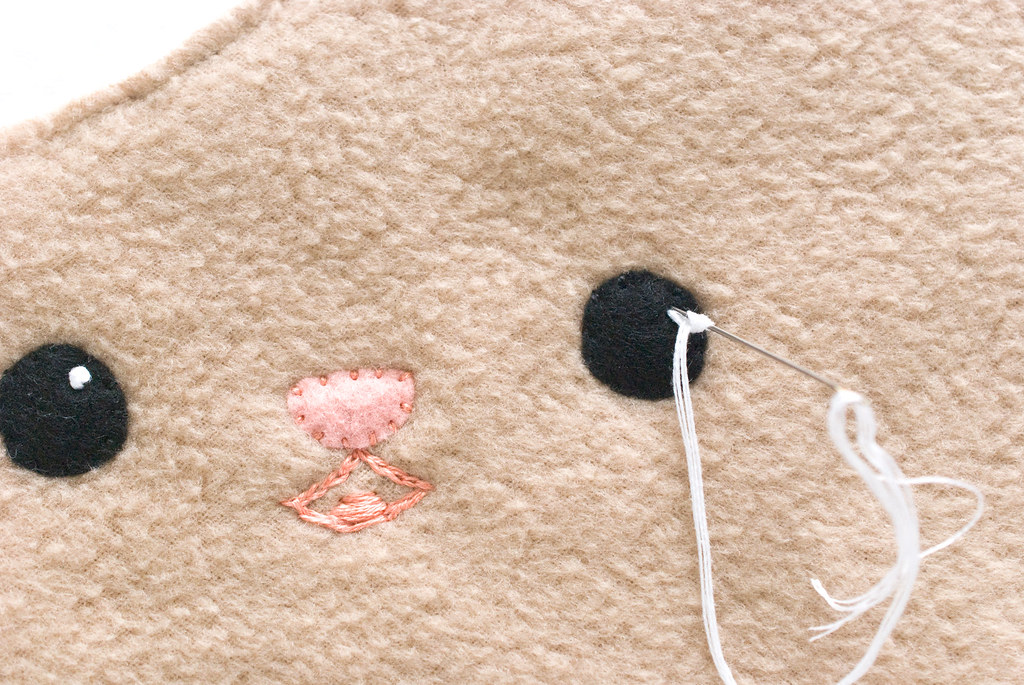
Use all six strands of white and a french knot to stitch the highlight on the eyes.
Pin the top and bottom together, wrong sides facing. If the edges don't match up exactly, don't worry. You can trim them down later. Just be sure that you are able to catch the fabric as you sew.
Sew around the edges, leaving one of the sides open.
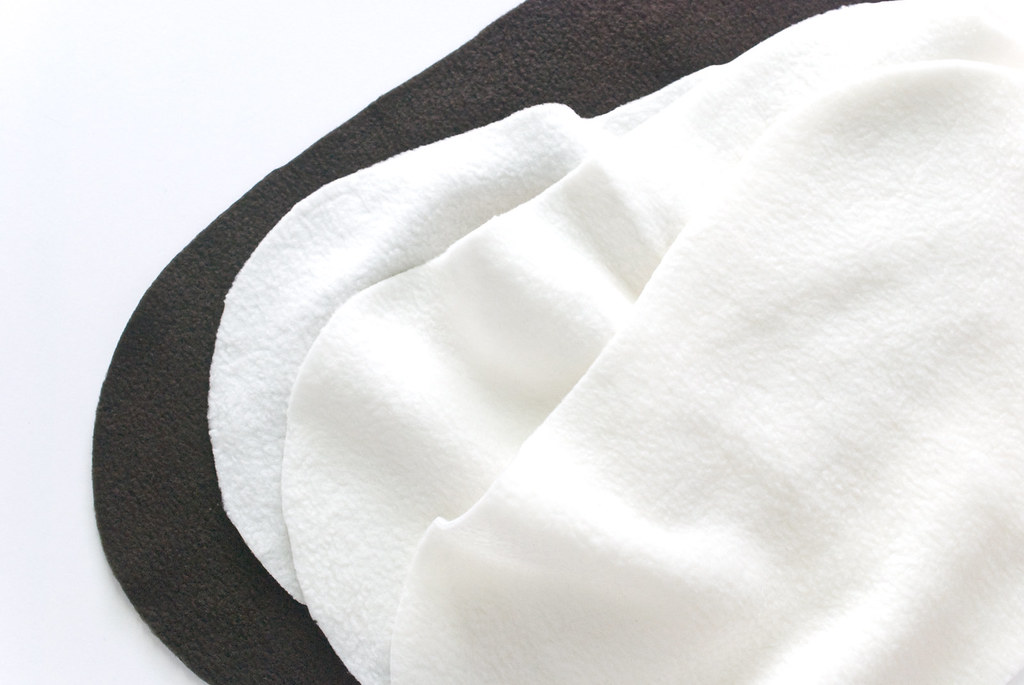
Cut a few more pieces of fleece using the body template. This time, don't add the seam allowance. Also, you don't need to follow the stretch guide, so cut them however it fits on your fabric.
I cut four pieces, but you can do more or less.
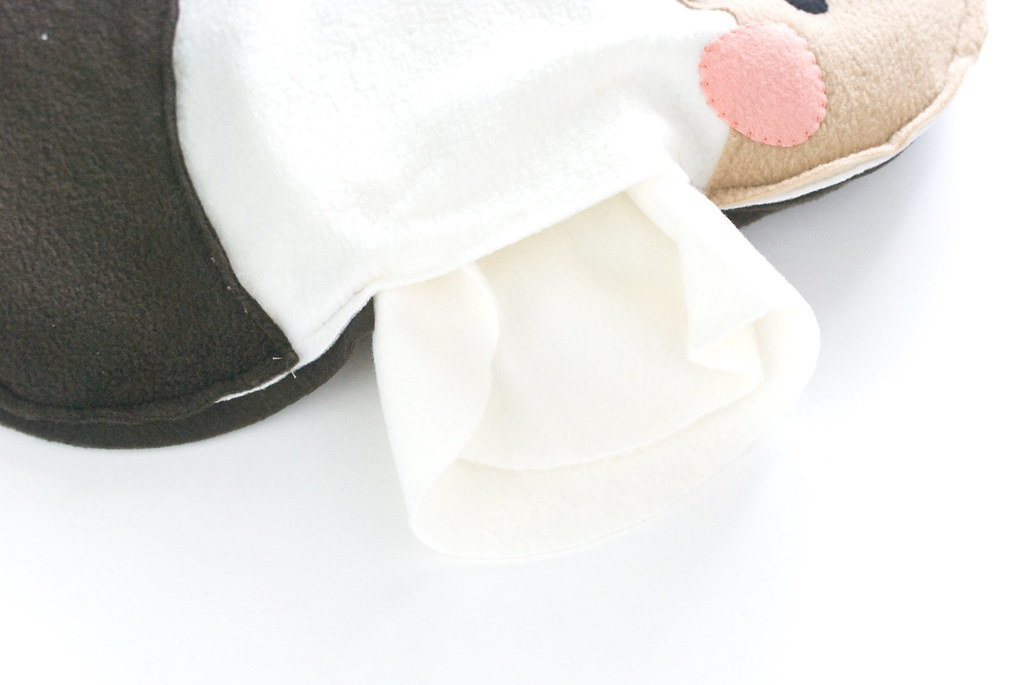
Slide the fleece pieces inside the guinea pig so they fill the body.
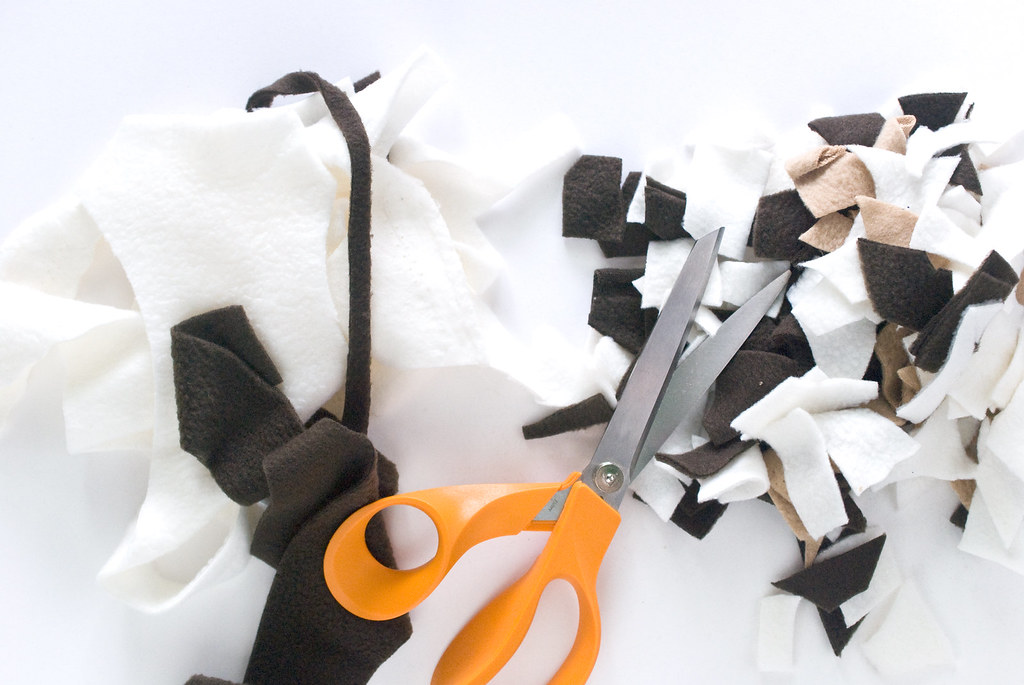
For some extra stuffing, I cut up a bunch of fleece scraps that would have gone in the trash. These, I put between the layers of fleece.
By the way, I opted to fill this with fleece because it won't be as soggy/lumpy as stuffing when it gets washed. That said, I expect that it will shift a bit when washed. I haven't tested it yet, but will update here when I do. I plan to just scrunch it around to keep my piggies comfy.
As an alternative, you could tack through the layers to make it a little quilted and keep the layers from moving. I may still do that. Or, if you're making this into a pillow for you, just use regular stuffing.
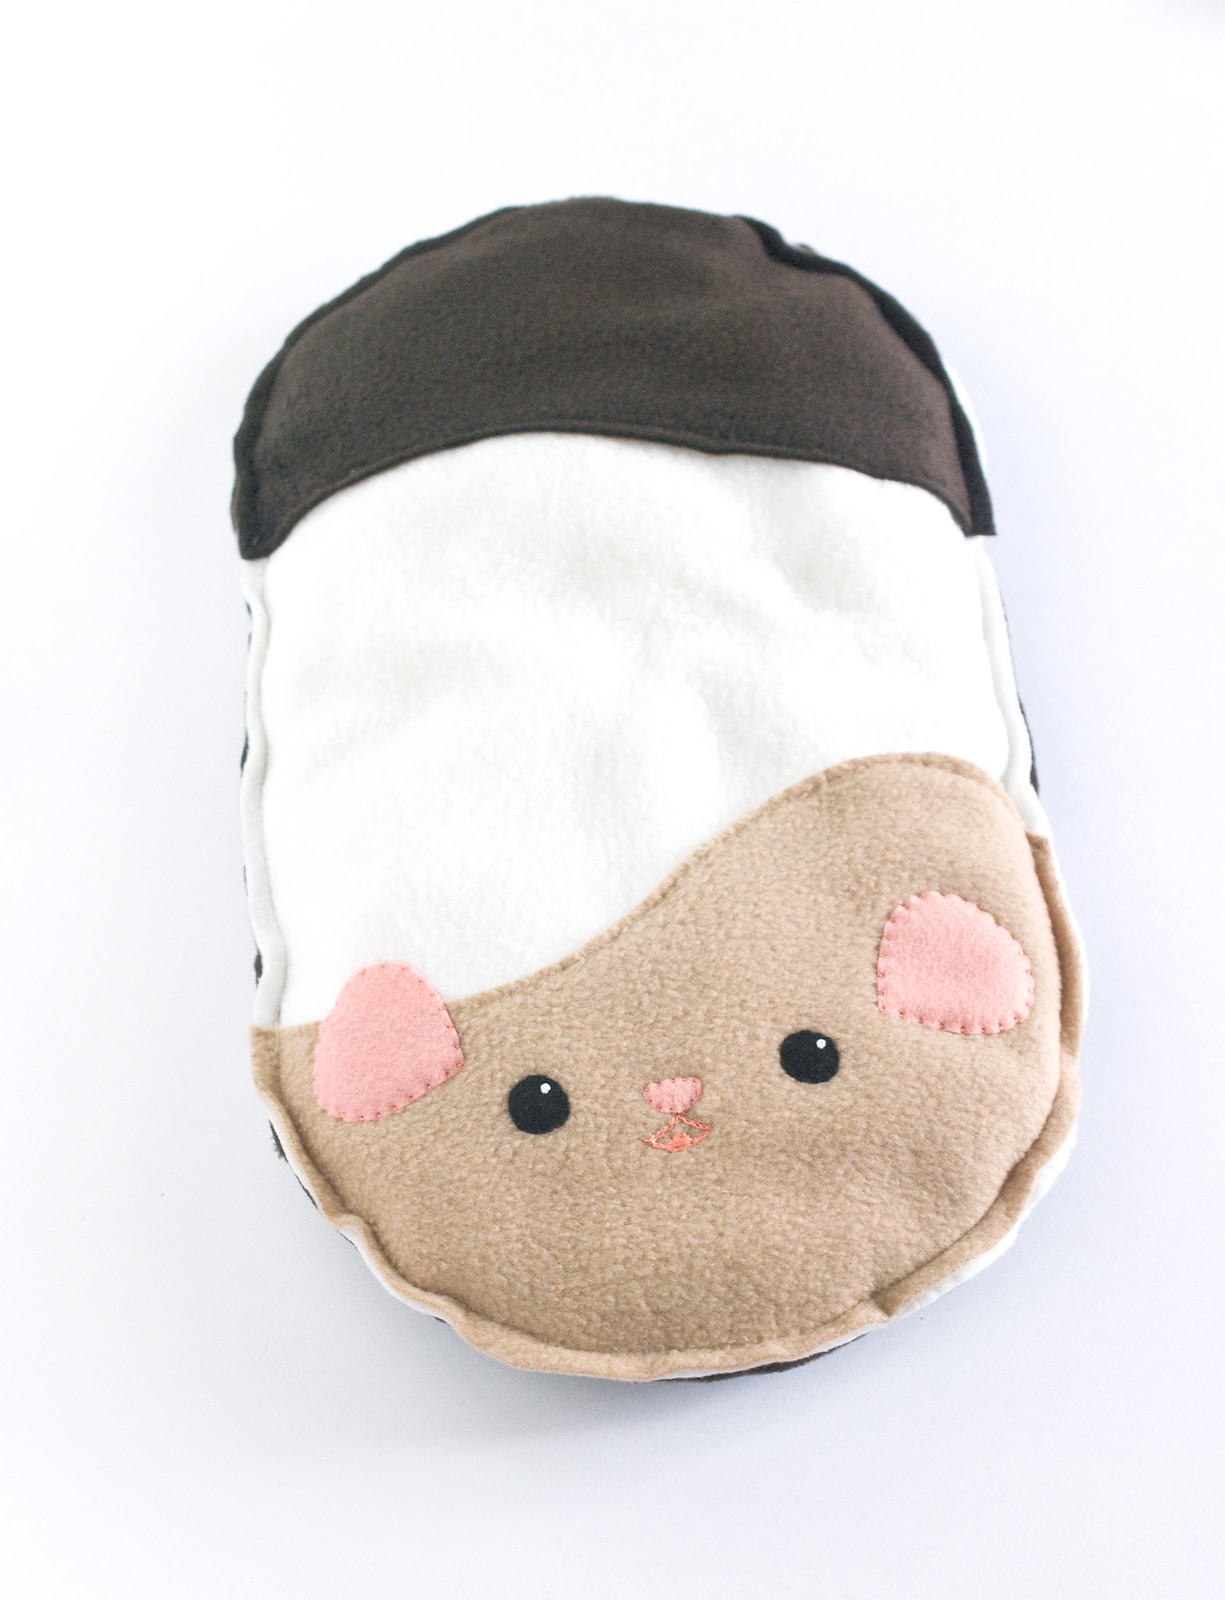
Sew the opening closed and trim the seam allowances as needed.
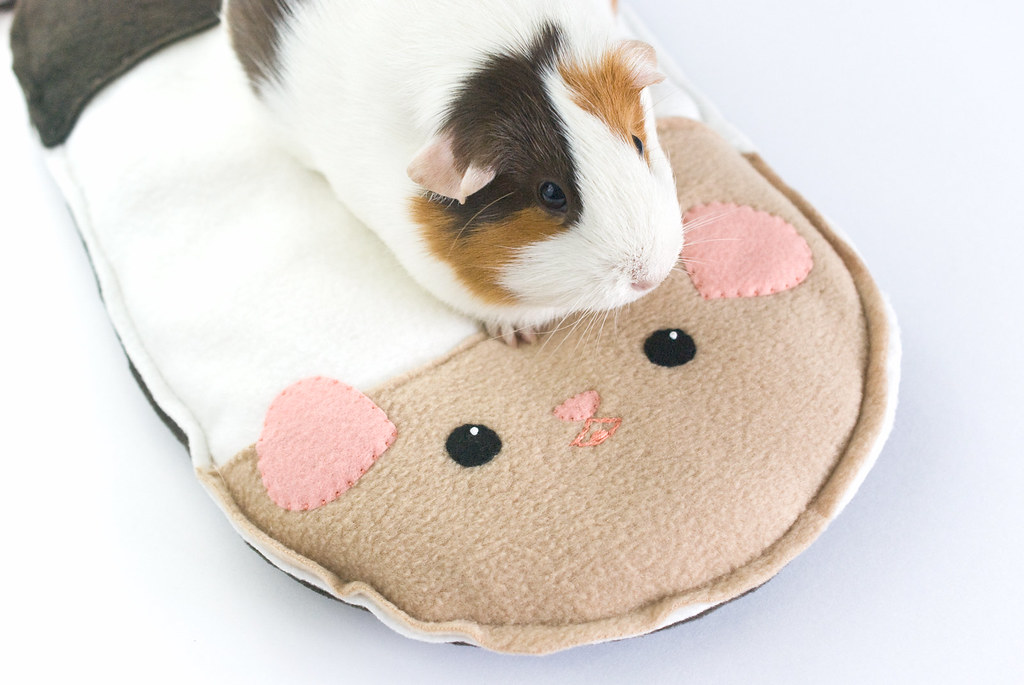
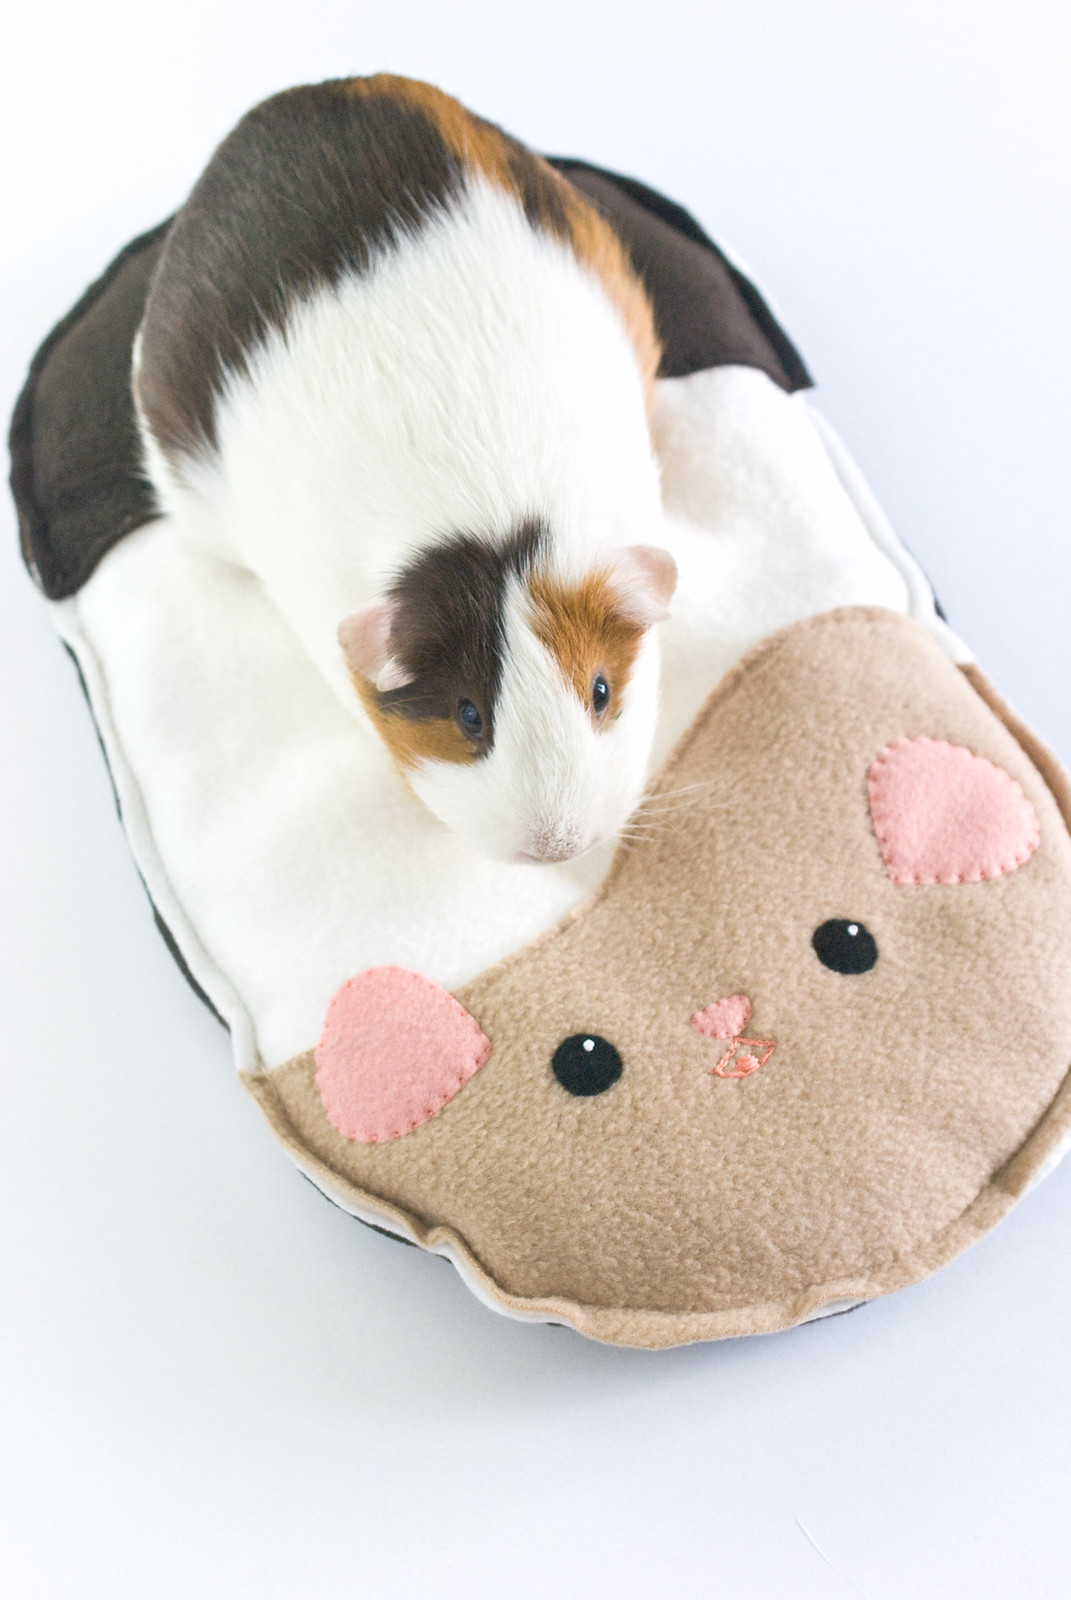
Let your pet try out their new cushion!

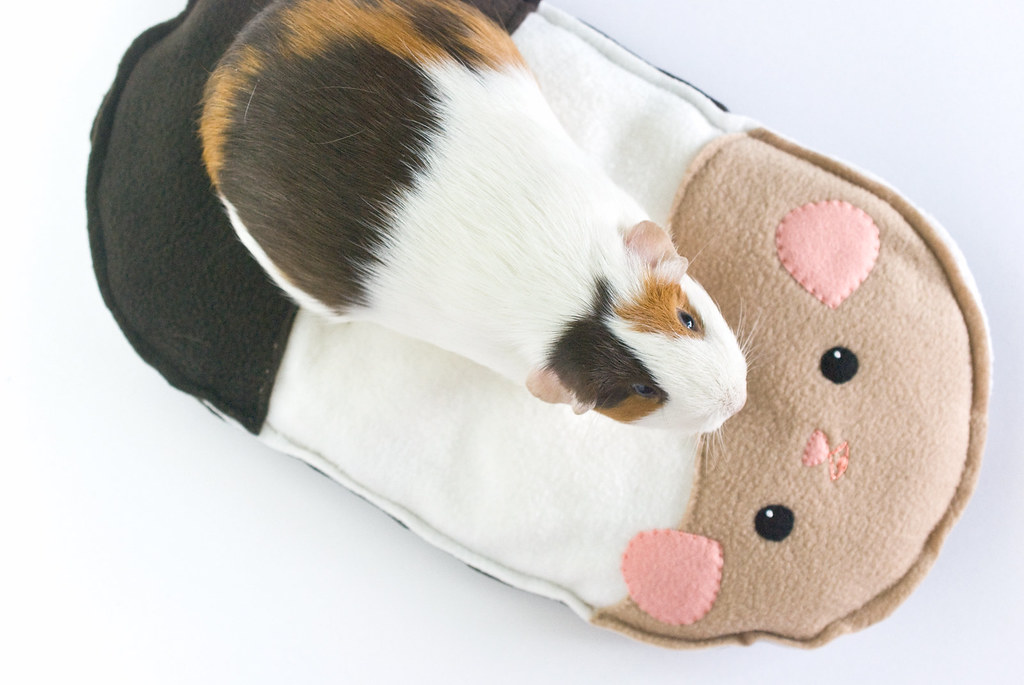
Lieutenant Nibbles is definitely enjoying her new comfy spot, and looking cute at the same time. Do you think she's noticed that her cushion looks a little like her?
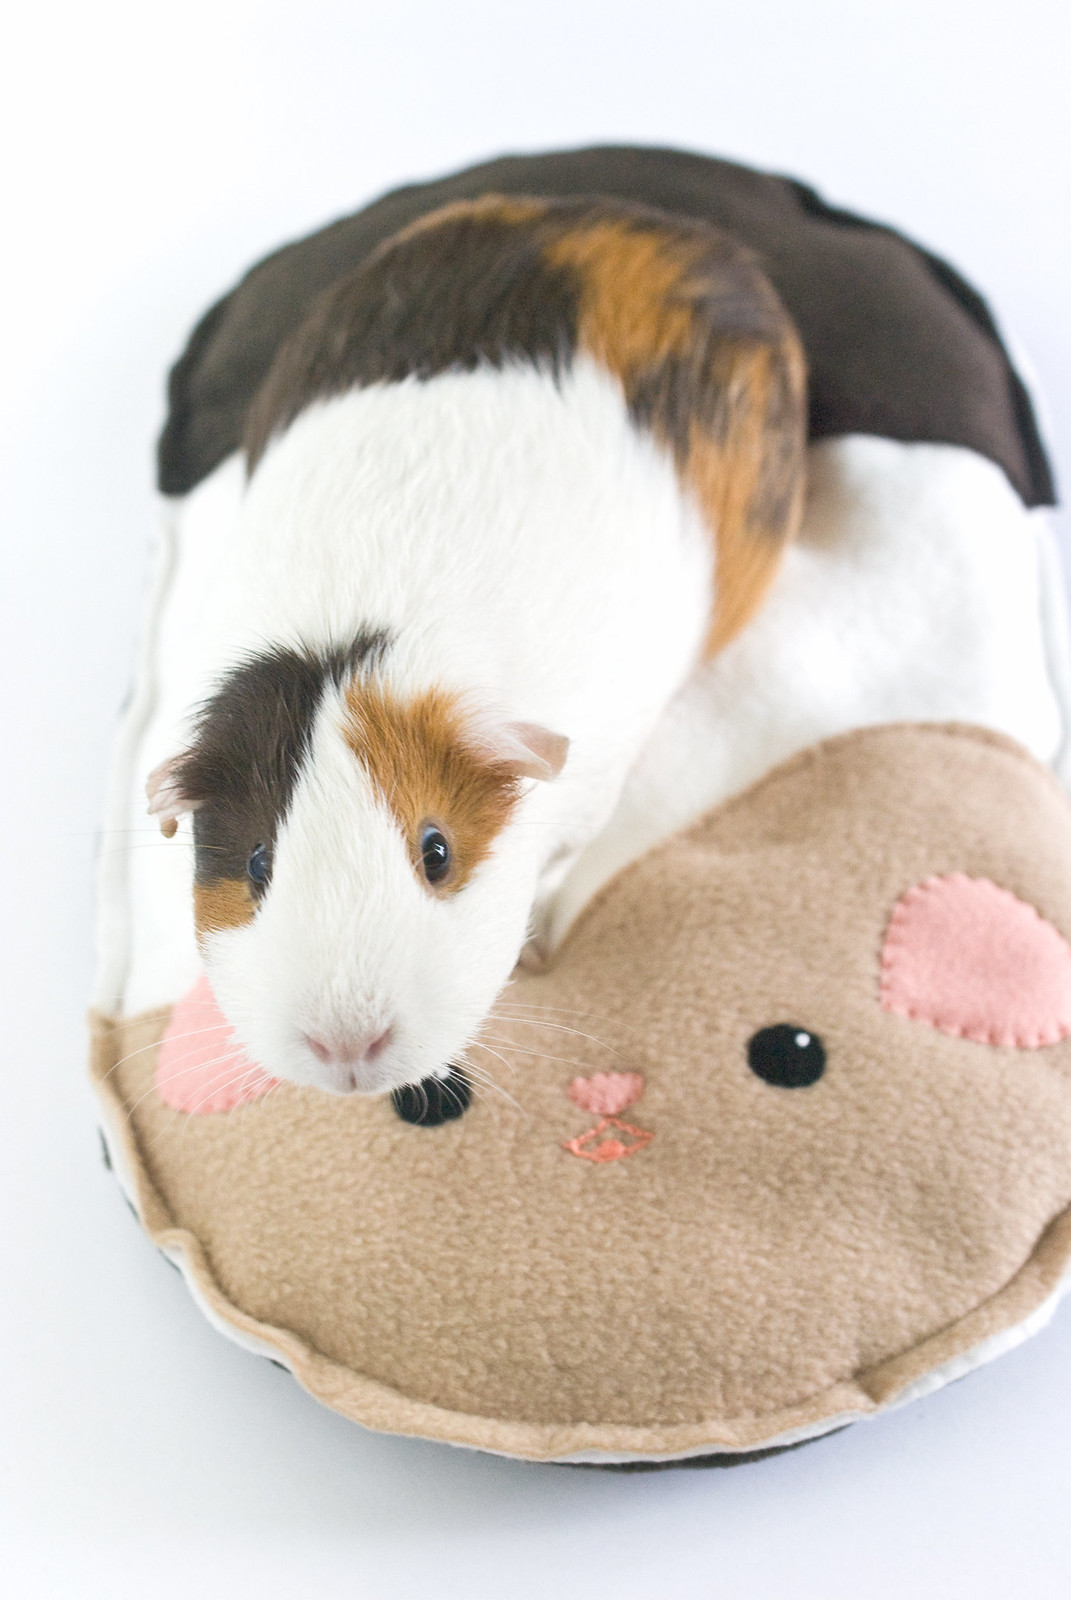
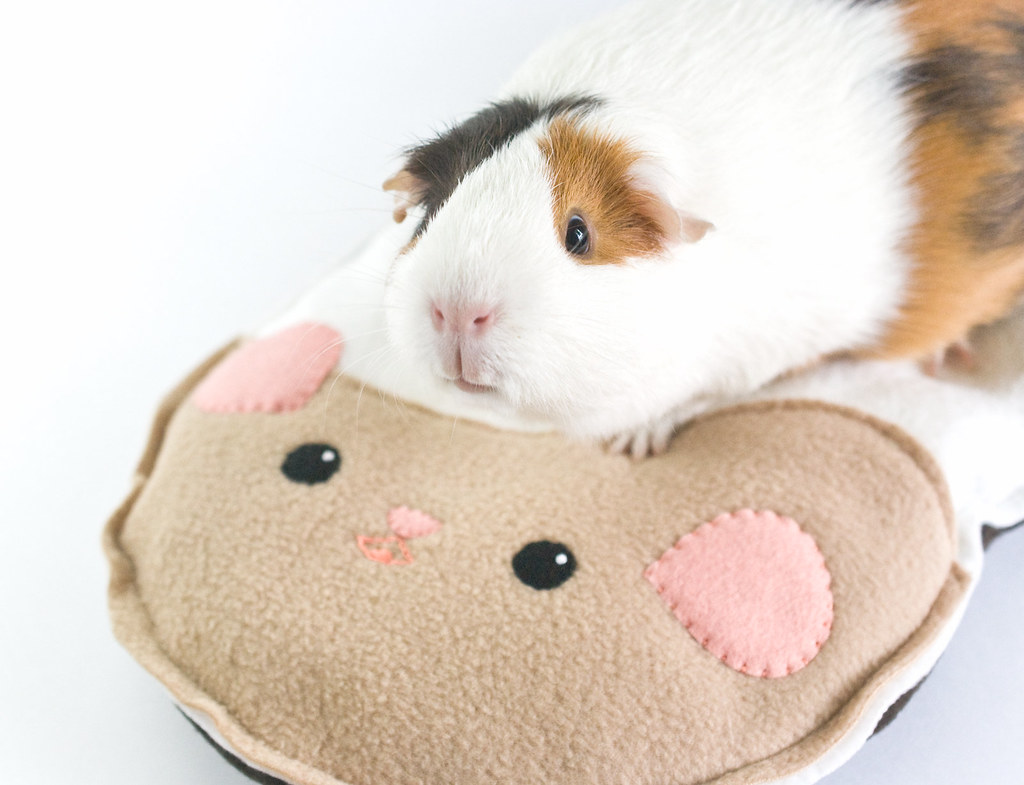
No time to notice that she's sitting on a guinea pig...she just wants to know if you have any food for her!
You are now reading the article project // guinea pig cushion New Update with the link address https://y3ant.blogspot.com/2017/07/project-guinea-pig-cushion-new-update.html
Judul : project // guinea pig cushion New Update
link : project // guinea pig cushion New Update
project // guinea pig cushion New Update
When I heard that July 16 is Guinea Pig Appreciation Day, I knew that I needed to do something to show my own appreciation for these sweet little critters that have captured my heart. Last year I made a pouch for them to laze about in, and they love it. So it seemed like time for another DIY designed for guinea pigs. Although this one would also be fun for humans too!
The idea for this came when one of my piggies was sitting comfortably in a bean bag chair watching an old episode of Scarecrow and Mrs. King on DVD. She was nestled in there and just so very cute. True story.
So I thought, what if they had their own piggy bean bag? Well, this isn't exactly a bean bag, but it is a soft and slightly squishy spot for piggies to watch some Netflix.
Of course, even when you're crafting for critters, you can make things cute. So I made my cushion look like a guinea pig. It's styled a bit like the stuffed guinea pig in my book, Stitch Love: Sweet Creatures Big and Small. Because of this, I think it would just as fun to make this as a little pillow for a piggy fan!
You will need:
No-pill fleece - guinea pig colors
Wool blend felt - black and pink
Embroidery floss - black, pink, and white
Sewing notions
Sewing machine
DOWNLOAD THE GUINEA PIG CUSHION TEMPLATE PDF
Cut two large body pieces from fleece. I used cream for the top and brown for the bottom.
To do this, place the pattern piece on the fold, paying attention to the stretch arrows on the template (not shown above). I extended my pattern piece to the edge of the paper, but you can cut it off for a stubbier guinea pig.
Cut around the edge adding a 3/8-inch seam allowance.
Cut the front and back accent pieces with an added seam allowance around the curved ends, but not on the swerve.
Pin the accent pieces to the top body piece and sew along the swerve. (That's officially now my technical term for that wavy bit.)
Cut out two eyes from black felt, and two ears and one nose from pink felt.
Arrange the face pieces so they look cute and start stitching them down. Use three strands of matching thread to tack down the edges of the felt.
Embroider the mouth with pink embroidery floss. I used chain stitch to make a thicker line, although satin stitch would probably be better for making super cute and smooth guinea pig lips. I did use satin stitch for the teeny tongue.
Use all six strands of white and a french knot to stitch the highlight on the eyes.
Pin the top and bottom together, wrong sides facing. If the edges don't match up exactly, don't worry. You can trim them down later. Just be sure that you are able to catch the fabric as you sew.
Sew around the edges, leaving one of the sides open.
Cut a few more pieces of fleece using the body template. This time, don't add the seam allowance. Also, you don't need to follow the stretch guide, so cut them however it fits on your fabric.
I cut four pieces, but you can do more or less.
Slide the fleece pieces inside the guinea pig so they fill the body.
For some extra stuffing, I cut up a bunch of fleece scraps that would have gone in the trash. These, I put between the layers of fleece.
By the way, I opted to fill this with fleece because it won't be as soggy/lumpy as stuffing when it gets washed. That said, I expect that it will shift a bit when washed. I haven't tested it yet, but will update here when I do. I plan to just scrunch it around to keep my piggies comfy.
As an alternative, you could tack through the layers to make it a little quilted and keep the layers from moving. I may still do that. Or, if you're making this into a pillow for you, just use regular stuffing.
Sew the opening closed and trim the seam allowances as needed.
Let your pet try out their new cushion!
Lieutenant Nibbles is definitely enjoying her new comfy spot, and looking cute at the same time. Do you think she's noticed that her cushion looks a little like her?
No time to notice that she's sitting on a guinea pig...she just wants to know if you have any food for her!
This is the article project // guinea pig cushion New Update
So many articles project // guinea pig cushion New Update this time, hopefully it can benefit you all. OK, see you in another article.
You are now reading the article project // guinea pig cushion New Update with the link address https://y3ant.blogspot.com/2017/07/project-guinea-pig-cushion-new-update.html